Saturday, November 29, 2008

Otto Dix's "Krieg", Part 8 *WARNING* GRAPHIC

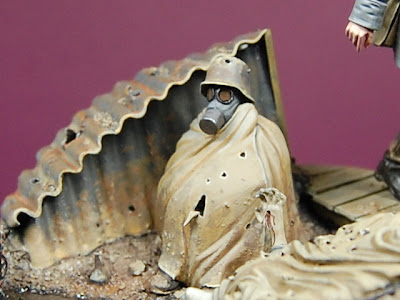
This is the final installment of Otto Dix's "Krieg". I added some pics from different angles this time. Sorry, nothing really "new".

Though not even close to his paintings, I hope it reflects in a small way his vision.

Thanks for following this project. I've just finished sculpting another figure and hope to post something in the next few days. This will be a sculpting sbs.

Thanks to all who have been following.


Thursday, November 20, 2008

Otto Dix's "Krieg", Part 7 *WARNING* GRAPHIC

Here's some closer pics of the "marching" figure. I didn't want to date him or "label" him from a particular regiment so I gave him a mixture of early and later war issue equipment.

The rifle is a ICM Dreyse neeedle gun conversion. The 1/35 scale 98's I have in my spares box looked too short for the WW1 issue. I covered a portion of the barrel with putty and added a pistol grip to the stock.

The face has much more contrast than the picture shows.


Sunday, November 16, 2008

Otto Dix's "Krieg", Part 6 *WARNING* GRAPHIC

Here some pics of the painted model. I'm still practicing with lighting/background with the new camera. Naturally the vignette looks different in the flesh despite my efforts with the camera to give the "perfect" magazine quality picture. I hope the viewer takes this into consideration when surfing the blog.

I may go back and do some touch-up painting here and there and post more pics later.

Thanks for looking.


Sunday, November 9, 2008

Otto Dix's "Krieg", Part 5 *WARNING* GRAPHIC

For the ground work, I used railroad model dirt for texture. I wanted something that showed distressed earth, not fine as sand but not too chunky either.

I sat the base in a bowl then spread dilluted white glue to the base. Then sprinkled the "dirt" onto the base. The bowl caught any overflow.

I let the base dry then primed and painted pretty much the entire base black.

The figure observing the scene was built in my usual way. Wire armature built up with Aves putty. The body
then scored while 75% cured with cross type of etching. This will help successive layers of putty "bite" into the flesh.

For mud, I was hoping to use Testors Green Putty to texture the boots and other areas of the model. But to my dismay, the tube was all dried up. I came up with an idea to try and use Aves. I mixed a small batch and saturated the mixture with water and mixed almost into a paste. I added a little Vallejo dark green paint to help see the texture. I then stippled the mix onto the figures with an old brush. The process worked o.k. but I had to work fast as the paint helped dry the mix too quick.


Big ol' pile of heads and armatures for the St. Privat project.